Blisters: To Repair or Not to Repair

This is a common question — and it will become more common — as roofing contractors and building owners increasingly commit to maintenance programs. The industry does not provide a concise answer to this question, though everybody appears to be in agreement that if a blister has opened it must be repaired. This is due to the probability that moisture will enter the system at these locations. The decision to repair unopened blisters has typically been left up to the judgment of the contractor. This article provides some guidance on whether or not to repair blistered areas on different types of conventional low-slope membrane systems.
Causes of Blisters
All conventional low-slope roof systems experience blisters in some form. Membrane systems are most susceptible to blistering because blisters are formed by voids between the plies or at the point between the substrate and the membrane. In bituminous systems, voids can be created by improper adhesion during application, improper mopping viscosity, moisture in or on the felts, unfilled insulation joints, coverage of loose or trapped material particles, and distorted insulation or metal materials.In bitumen-based systems, the dynamics of blister expansion is a highly scientific process. Blister growth is predicated by the evaporation of moisture and the expansion of the water vapor that is contained within the void. In layman’s terms, as the liquid moisture evaporates, it expands the water vapor (gasses) in the void and increases the size of the blister. Voids created by liquid moisture can be smaller than air-water vapor voids to create blisters. Blisters in adhered single-ply systems are typically created by voids resulting from improper adhesion during application.
The formation of blisters in all conventional low-slope membrane systems can be avoided with proper adhesion of the membrane to the substrate. One hundred percent adhesion is required during application. Also, the intrusion of moisture into the system — during application or in aged conditions — contributes to blister formation. Despite roofers’ convictions over the years that hot mopping eliminates moisture on felts or substrates in bituminous applications, studies have indicated that this theory is incorrect. It has been found that hot bitumen only eliminates up to 60 percent of moisture from the felt; the remaining 40 percent, which can be trapped in interply layers, can create blisters.
Repair of Blisters on BUR Systems
Deciding whether to cut out and remove, patch over to reinforce, or simply monitor blisters, is a judgment call. In general, it may be preferable to leave them undisturbed. Some characteristics that may determine the need to repair blisters are:
- Excessive loss of gravel or surfacing
- Membrane deterioration
- Blisters in laps that have reduced lap coverage
- Blisters that have breaks
- Blisters that have fatigue cracking
- Blisters that occur in areas of high traffic
Should it be determined that blister removal is necessary, the following steps should be followed:
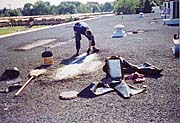
1. To promote thorough adhesion of a patch, it is essential to begin by preparing the surface. Remove debris, contaminants, aggregate or loose surfacing from the surface of the membrane or flashing to be repaired. The area to be repaired should extend a minimum of 18 inches beyond the perimeter of the defect to provide an ample, clean area on which to install the patch and tie it into the existing roof membrane.
2. If the membrane surface has been flood-coated and aggregate-embedded, carefully spud the aggregate free from the surface and sweep clean.
3. Carefully cut and remove the blistered material until good adhesion of the membrane is reached.
4. If water infiltration is suspected, open the membrane and inspect the insulation and deck for damage. Remove wet or damaged insulation and repair or replace the deck as required. Properly attach new, dry insulation consistent with the thickness of the existing insulation and compatible with the other roof system components.
5. Prime the surface of the membrane (asphalt BUR only) with asphalt primer and allow to dry. Primer contains solvents and is used to enhance adhesion; however, overuse of primer can harm the membrane and inhibit adhesion of newly applied material.
6. Install the same number of plies as were damaged or removed (a minimum of two plies) in hot bitumen or cold-applied adhesive. Extend the bottom ply at least 6 inches beyond the area to be repaired and each succeeding ply at least 3 inches beyond the previous ply. When using hot bitumen as the method of application, take care to maintain the bitumen at EVT. As an alternative, on asphalt BUR membranes only, two plies of smooth-surfaced modified bitumen sheets may be installed by torch application, in hot asphalt or suitable cold adhesive, whichever is appropriate for the modified sheet being used. When using hot asphalt as the method of application, use Type III or Type IV asphalt and take care to maintain the asphalt at EVT.
7. Reapply the surfacing. Either embed aggregate in hot bitumen or roof cement or apply a surface coating compatible with the existing surfacing. Liquid-applied coatings should be installed per the manufacturer’s instructions, which may include a waiting period. For small repair areas, it is a common practice to apply the coating immediately after the membrane repair is made.
Repair of Blisters on Modified Systems
In general, blisters that are keeping air in will keep water out, and unless the blisters have certain characteristics, it may be preferable to leave them undisturbed. Some characteristics that may determine the need to repair blisters on modified systems are:
- Loss of granules or other surfacing
- Membrane deterioration
- Blisters in seams which have reduced lap coverage
- Blisters that have breaks that can admit moisture
- Blisters that have fatigue cracking around the circumference
- Blisters that occur in areas of high traffic
If it is determined that blister removal is required, the following procedure should be followed:
1. Remove the membrane from the blistered area down to the existing substrate. Inspect the membrane for possible moisture infiltration.
2. If water infiltration is suspected, open the membrane and inspect the insulation and deck for damage. Remove wet or damaged insulation and repair or replace the deck as required. Properly attach new, dry insulation consistent with the thickness of the existing insulation and compatible with the other roof system components.
3. To promote thorough adhesion of a patch, it is essential to begin by preparing the surface. Remove debris, contaminants, surfacing, ballast or loose granules from the surface of the membrane or flashing to be repaired. The area to be prepared should extend beyond the perimeter of the patch to provide an ample clean work area on which to install the patch.
4. Clean the surface of the membrane. If the membrane surface has been flood-coated and aggregate-embedded, carefully spud the aggregate free from the surface and sweep clean. The exposed asphalt flood coat may need to be heated with a torch in order to smooth out irregularities, then allowed to cool.
5. Prime the surface of the membrane with asphalt primer and allow to dry. Primer contains solvents and is used to enhance adhesion; however, overuse of primer can harm the membrane.
6. Cut a patch of like material 8 inches larger in all dimensions than the defect to be repaired. Round the corners of the patch to a minimum radius of 3 inches.
7. Install the patch in hot asphalt, cold adhesive or by heat welding (in accordance with the manufacturer’s recommendation) over the repair area, extending 8 inches in all directions from any part of the defect. When using hot asphalt as the method of application, use Type IV asphalt and take care to maintain the asphalt at a minimum of 400 degrees F at the point of application. When torching, work gradually, applying heat only sufficient to achieve adhesion without damaging the membrane reinforcement or scorching surrounding membrane.
8. Apply moderate pressure to the patch to ensure adhesion to the existing membrane.
Repair of Blisters on Adhered Single-ply Membrane Systems
Blisters on adhered single-ply membrane systems are typically caused by lack of adhesion at the point of application. If the membrane is not weathered or cracked, repairs are typically not required. Bonding of the membrane to the substrate is of concern at perimeter areas, particularly at low-profile edges, to eliminate probability of roof blow-offs. If unbonded areas are at these points, or if they are of considerable size or frequency, repairs should be completed. Refer to the membrane manufacturer’s proper repair procedures in these cases.Conclusion
The decision to repair blisters on a conventional low-slope membrane system is largely a judgment call. Hopefully, the criteria established in this article will help you when you are faced with this decision on a building owner’s roof. The size and the frequency of blisters will also have a bearing on your decision. One other fact to consider is that blisters are defects to the membrane system. They have the potential to open up, creating leaks and moisture infiltration into the system. They also have the ability to diminish the service life of the roof system. When repairs are completed in the context of a maintenance program, where the intent is to add service life to the system, it may be best to complete the repairs. Follow the old adage “When in doubt, take them out.” This will lead to fewer callbacks on repair projects and help your bottom line.Looking for a reprint of this article?
From high-res PDFs to custom plaques, order your copy today!


